Used Tyan S7012 How-To
Per the title, I bought a used Tyan S7012GM4NR motherboard as the start of my new home server build. They’re super cheap on Ebay, and can be had for less than $US80!
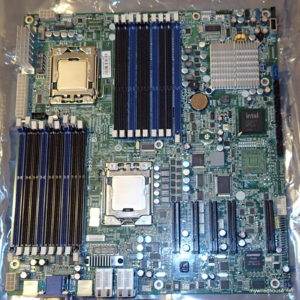
And here it is in all its glory:
- Dual LGA1366
- 18 RAM slots (Triple channel config – 9 slots per CPU)
- 4 gigabit ethernet ports
- IPMI BMC for ethernet-based KVM
- 6 SATA II ports
- 5x PCIe 8X slots
- Freaking huge SSI-EEB format (12″x13″)
So I plugged it in, and the first hurdle was connecting to the Board Management Console (BMC) which uses IPMI. So lets turn this page into something of a how-to with a few sections, to make it easy to navigate.
Connecting to the TYAN S7012 IPMI console
The clue here is reading the boot screen.. which granted, can be tricky as it scrolls past fairly fast.
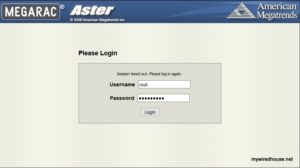
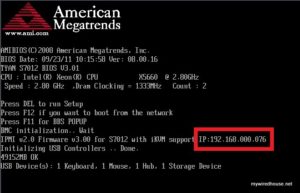 To make it easy, the BMC shows you the IP address its configured with. If you’re lucky, its already set to use DHCP and the login details are reset to the default out-th-box ones, which are:
User: root
Password: superuser
Of course, being a used board, chances are, like mine, someone already used it (duh) and changed the login details.. so some headscratching ensued, with the problem being fixed by a flash of the IPMI firmware. So thats the next section..
Flashing the Tyan S7012GM4NR
Disclaimer: This guide is provided for your assistance. However, it is not a suitable replacement for receiving support from a qualified person, and any attempts you make at flashing your own firmware are undertaken entirely at your own risk. If you brick your board, don’t come crying to me, I’ve bricked stuff in the past, and its not a nice feeling, I know, but it was my own fault. If your board is bricked as a result of your experimentation, own your mistakes.
There are two BIOS’ on the board. One which manages the board itself and associated hardware and interrupts, and one which manages the management console (BMC). I flashed them both, becuase I couldn’t resist.. and also because I wanted to make sure the board was relatively bug-free and had the fixes applied for some SATA issues which Tyan’s page made me aware of.
First step is to make yourself a DOS bootalbe USB stick. Once you have access to the IPMI interface you can remotely load ISO images and do this kind of thing without having to actually stick a USB into the box, but first I needed access, so physical USB it was! I like to use a Windows ME DOS bootable usb stick, as it supports FAT32 and exFAT file systems (see – there was a single good thing about Windows ME!). I use the images here on the download page of allbootdisks.com
Flashing S7012 BIOS
First stop – Tyan’s website for the download page for the S7012 motherboards. Unpack the zip file into a bolder on your cursed WIndows ME usb stick, and boot up the board:
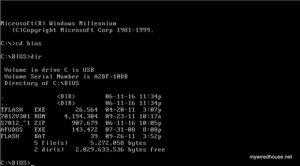 The file you’re after is Flash.bat – you can either run it and trust Tyan, or have a look at its contents and run the command directly:
TFlash 7012V301.ROM /P /B /N /C /REBOOT
After the flash and reboot, there are a few settings I changed from the defaults, mostly for power-saving reasons as thats more useful to me than performance:
Advanced - IDE Configuration - Configure SATA as: [AHCI]
Advanced - IDE Configuration - Hot Plug [Enabled]
Advanced - ACPI Configuration - Chipset ACPI Configuration - APIC ACPI SCI IRQ [Enabled]
Advanced - Hardware Health Configuration - Auto Fan Control [Enabled]
Advanced - Hardware Health Configuration - PWM Minimal Duty Cycle [30% Duty Cycle]
Advanced - PCI Express Configuration - Active State Power-Management [Enabled]
Boot - Boot Settings Configuration - Quick Boot [Enabled]
Chipset - CPU Bridge Configuration - QPI L0s and L1 [Enabled]

Save Changes and Exit (F10)
Flashing the Board Management Console (BMC)
The easy part is getting the IPMI firmware file – right there on Tyan’s website. Check! Next part was figuring out where to get the tool to actually flash it. After some scratching, logic took me to the Tyan HelpStar support knowledge base – you have to register to be able to search or browse the knowledge base, but in the knowledge base is request ID 2101 titled “How can the AST2050 Firmware be updated under DOS?“. And linked in the Documents section of that item, is a file called AST2050_DOS_FLASH.zip
Once you get both the IPMI firmware, and the AST2050_DOS_FLASH.zip file, unzip them both to a folder on your USB stick, and boot up from it:
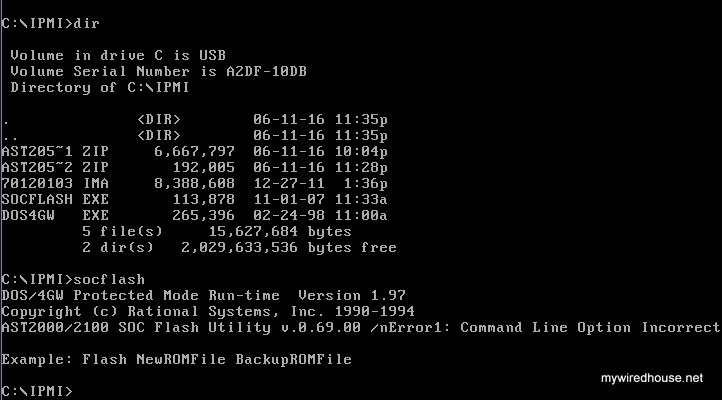
So, time to run it – I would show a screenshot, but you can’t flash the IPMI while you’re using it to connect to the machine.. 🙂
socflash 70120103.IMA skip 2
Where did I get the above command? From the Tyan knowledge base.. here’s the text from their site:
After the screen shows “Success: Update the ROM File Properly!!”, the AST2050 will automatically restart, which takes about 1 minute.
From there, you can use the default login:
User: root
Password: superuser
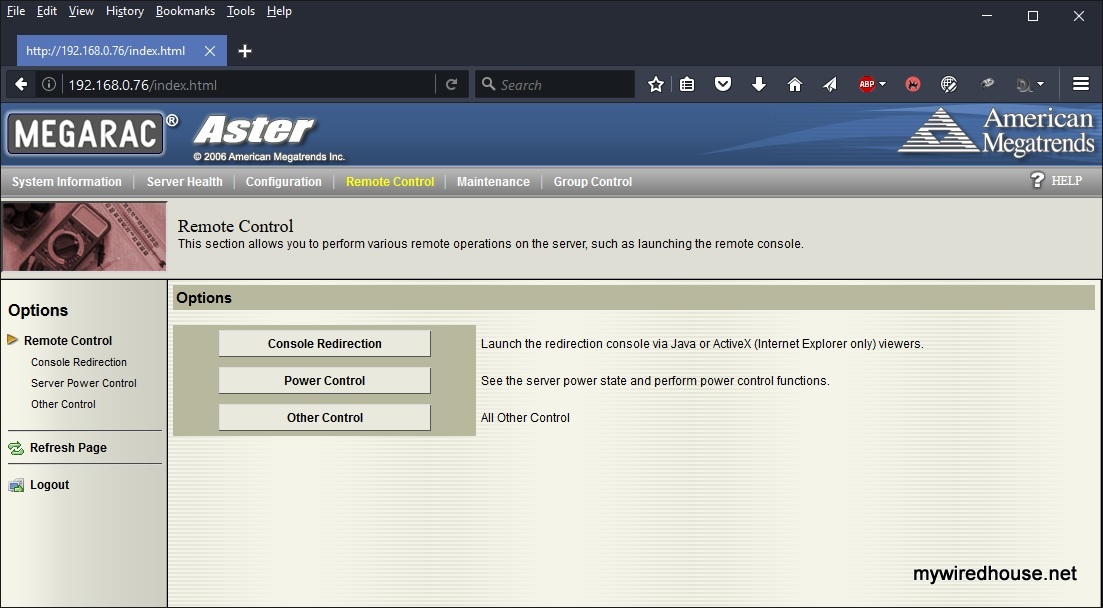
Victory!!
Resetting a Tyan IPMI password
Doing a reset password on an S7012 is very poorly documented.. If you’re flashing the BMC BIOS, then that will reset the password for you. However, if you’re already on the latest BIOS version, there’s a utility which Tyan provide via their support forum called UH8.EXE which will allow you to reset the password from a DOS environment.
Ooroo.
Could anyone share the file used to flash the BMC firmware. I have the .ima file already but have not found any way to execute it under DOS and the link provided does not work. Please help
I flashed my board BMC and assigned it an ip address in the BIOS. I can only connect to the IPMI web interface if the NIC is not active when I boot into my operating system (ubuntu 22.04). Is this typical behavior?
I ordered one of these, what case and power supply do you have?
Sharkoon Pure Steel, case midi ATX
Corsair TX650M Serie TX-M
Hi Hilton,
Thank you for providing this information. Now I can use iKVM again 🙂
socflash is not present at the linked place. I downloaded v.1.09.04 from softpedia and used rufus + FreeDOS for creating the bootable drive.
By the way, this board allows you to use a mix of 1Rx4 and 2Rx4 DIMMs (maybe someone is interested)
Cheers!
Ironiff
Please can you tell about the power the Power supply you have used to power up?
I have one S7012 and Astec 450W power supply from HP Server , and and I’m thinking to adapt for this board.
Thank your this was helpful .Dorisvaldo
anyone got a clue on how to OC a CPU on this board ?
Hi all. Do someone tried to get wide resolution for AST2050 VGA? I have only 4:3 resolution up to 1600×1200, quite high for this type of card but nothing like 1440×900. Any hint? Running windows server 2016 with aspeed 1.03 driver, bios and firmware up to date as per this guide.
Its an 8 megabyte VGA card – really designed for only running headless, or at best, maybe 1024×768 if you need a console.
If you need anything wider or for more frequest desktop usage, I highly recommend getting even a very cheap used PCIe graphics card with more like 256MB of video memory.
Hello!
I’m considering purchasing the Tyan S7012 for a secondary workstation project. I wanted to know if the board has a TPM (required for BitLocker encryption in Windows) chip? This can be easily verified by looking at the Trusted Computing section in the BIOS. If one of you (as existing owners of the board) can look this up and let me know, I can then confidently proceed.
Thanks in advance!
the option is present in the bios but idk if a tpm chip is actually installed.
Answering my own question as I subsequently purchased the board and can authoritatively respond. This board does come with a TPM (v1.2).
Cheers Arvind for closing out the question! Much appreciated.
I’m in the midst of moving hardware again and think this time I’ll be encrypting my drives. Unfortunately, Supermicro charge for an extra hardware TPM which plugs into the board (X9DRH-7F).. sigh.
Just a quick update for those who might hit similar problems – I just reflashed the BIOS (as opposed to the BMC) and while the flashing process itself went fine, I started having problems with the iKVM locking up intermittently until I started the graphics in the jConsole menu, and sometimes disconnecting completely and requiring a relaunch of jConsole. This would typically happen after a reset, just before the POST screen. As both disconnect any virtual CDROM, this made it rather difficult to remotely work on the server.
I eventually worked out that going in the BIOS Setup to Advanced – Onboard Device and PCI Slots Configuration and setting ‘Lan (82574-2)’ to Disabled as opposed to Auto sorted out the instability. I assume this is the Ethernet port that is shared with the IPMI, and that when the port was being initialised for non-IPMI use, it was disturbing the IPMI connection in some way. Flashing the BIOS cleared the CMOS and reset the LAN port setting back to its default of Auto, causing the problem.
If you have this issue and are using the iKVM rather than the console, don’t set ‘Quick boot’. That meant the opportunity to go into the BIOS setup flashed by so fast I couldn’t do it due to not having time to restart video after the iKVM freeze. In order to get back into the BIOS Setup via the iKVM, I had to go to Remote Control – All Others Control in the IPMI and clear the CMOS. That allowed me to go into the BIOS Setup (after a video restart) to disable the LAN port.
Thanks very much for this – saved me a ton of time!
Getting an iKVM was definitely a bonus as the company seeking me a refurb storage server had told me it didn’t come with one, just basic IPMI 🙂
This might sound like a noob, but i read in the manual that these mobos aren’t ATX power supply compatible, what kind of power supply did you use to get it on?
Just find a atx power supply with two 8 pin cpu cables.
Just wanted to say a quick thanks – i couldn’t get into ipmi, but followed these steps to flash the ipmi, and worked perfectly. It even seemed to fix an issue i had with the fans not spinning down correctly.
Only difference was i used the rofus usb tool to create a bootable FreeDos usb drive, But everything else i did the same.
(https://rufus.akeo.ie)
Do you happen to know what (if anything) the 4th rj45 port is for? On the chassis my board came in, it’s marked n/a, but does light up when i plug it in, so must be connected to something.
Do you know if we can upgrade the AST2050 firmware newer than the version provided on the TYAN website?
How?
Has anybody modified the bios on this motherboard s7012?
Does anybody know if this board support SLI with 2 EVGA Grafikcards? My EVGA gtx 970 works perfekt.
I would wery much like to modify the bios so i can overclock my x5690 cpu. Maybe someone has the solution for this?